 ultimate-guide
UTV Trail Riding Gear Essentials for 2026
Table of Contents
- Build Your UTV Trail Riding Gear Essentials Kit
- Best UTV Safety Equipment: What You Must Wear
- Essential Trailside Repair Tools
- The Complete UTV Recovery Gear Kit
- Emergency, First Aid, and Communication Gear
- Storage Solutions and Weight Distribution
- Your Pre-Ride UTV Trail Riding Checklist
- Conclusion: Ride Prepared on Every Trail
- Frequently Asked Questions
Last Updated: September 7, 2026
Build Your UTV Trail Riding Gear Essentials Kit
A successful trail ride depends less on the machine and more on what you pack alongside it. Your utv trail riding gear essentials kit is the difference between a minor delay and a day-ending breakdown. At Monarch Honda, we are committed to helping you find the perfect vehicle to fuel your adventures with top-quality inventory and professional support.
The core of any kit is preparation. Before you consider accessories, your UTV itself needs a baseline of maintenance: fresh oil, properly inflated tires, and a charged battery. According to [the ATV(/atv-vs-tractor-property-maintenance) Safety Institute's rider handbook | atvsafety.org], most mechanical failures on the trail stem from preventable maintenance issues that were ignored before departure. Start with a reliable machine, then build your gear around the three pillars of safe riding: personal protection, mechanical preparedness, and emergency communication.
Best UTV Safety Equipment: What You Must Wear
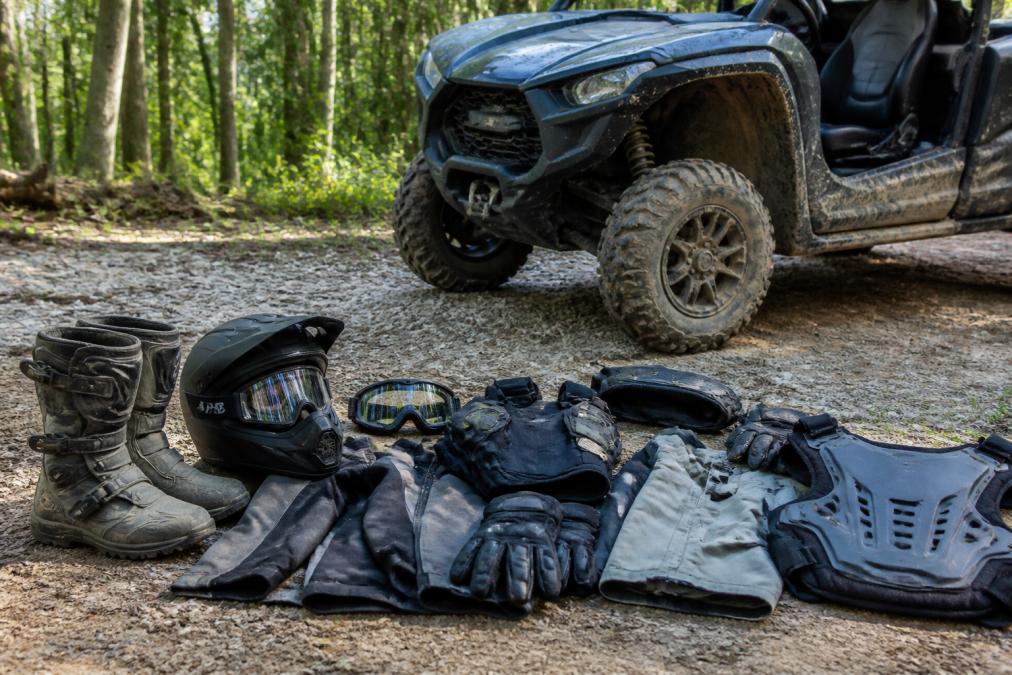
The best UTV safety equipment starts with what you wear, not what you carry. A roll cage and seat belts are your last line of defense in a crash, but they do nothing against debris, dust, and the elements. Your PPE is the difference between a minor incident and a trip to the emergency room.
Helmet: Your Most Critical Piece of Gear
A DOT-approved or Snell-certified helmet is non-negotiable. While a full-face helmet offers the most protection, many UTV riders prefer a motocross-style helmet paired with goggles for visibility and airflow. In an open-cab UTV, a visor or tear-offs are essential for blocking sun and mud. Check the manufacturing date, most manufacturers recommend replacing a helmet every five years, even without a crash, because the EPS foam liner degrades (the CDC).
Eye and Face Protection
Goggles are a necessity, not an accessory. Dust, branches, and rocks kicked up by the tires travel at speed. Look for anti-fog coating and UV protection; if you wear prescription glasses, consider an over-the-glasses (OTG) model. For cold-weather or high-speed riding, a face mask or neck gaiter adds protection against wind chill and debris.
Gloves: Grip and Protection
Your hands are your primary interface with the machine. A good pair of off-road gloves provides grip, impact protection, and weather defense. Look for reinforced palms, padded knuckles, and touchscreen-compatible fingertips so you can use your GPS without removing them. For cold weather, choose an insulated glove with a waterproof membrane; for summer, a ventilated glove prevents sweat buildup that leads to blisters.
Footwear: Ankle Support Is Non-Negotiable
Sturdy, over-the-ankle boots are the only acceptable footwear for UTV riding. A motocross boot offers the highest protection with reinforced toe boxes, shin plates, and ankle support. If you prefer a more casual fit, a hiking boot with a stiff sole and ankle coverage is a minimum. Avoid tennis shoes or work boots, they offer no ankle support and can slip off in a crash.
Technical Layering: The System That Keeps You Riding
Your clothing is a system, not a single garment. The three-layer system is the industry standard:
- Base Layer: A moisture-wicking synthetic or merino wool shirt pulls sweat away from your skin. Cotton traps moisture and leads to hypothermia in cold weather and chafing in warm weather.
- Mid Layer: A fleece or insulated jacket traps heat. For cold-weather riding, a mid-layer with a windproof membrane is a significant upgrade.
- Outer Shell: A waterproof, breathable jacket and pants block rain, wind, and mud. Look for a shell with sealed seams and adjustable cuffs that seal around your gloves and boots.
For your lower body, reinforced riding pants with knee pads or integrated armor protect against impacts and abrasion if you are thrown from the machine. Rain pants that pull over your riding pants are a lightweight addition that pays for itself on the first wet trail.
The Cold-Weather Add-On
If you ride in temperatures below 50°F, add insulated, waterproof gloves and a balaclava or neck warmer. Your extremities lose heat first, and cold hands make it impossible to operate controls safely. A heated grip kit or heated gloves are a popular winter upgrade.
Essential Trailside Repair Tools
Your utv trail riding gear essentials kit needs a repair kit that matches your machine's weaknesses. A tire plug kit and a 12v air compressor handle the most common trailside failure: flats. For belt-driven UTVs, carry a spare belt and the tools to swap it, since a shredded belt leaves you stranded.
Beyond the big items, pack zip ties and duct tape, they fix everything from a loose panel to a radiator hose. A basic socket set, adjustable wrench, and multi-tool round out the kit.
The Complete UTV Recovery Gear Kit
A UTV recovery gear kit is what you hope you never need but will be glad you packed. The two essential pieces are a tow strap and a winch. A tow strap rated for your UTV's weight allows another vehicle to pull you out of mud or a ditch; a winch lets you self-recover when riding solo.
Recovery gear also includes traction aids. Traction boards or scrap carpet provide grip when your tires spin on slick rock or sand. A collapsible shovel helps you dig out the wheels before attempting a pull.
| Recovery Gear | Primary Use | When You Reach for It |
|---|---|---|
| Tow strap | Vehicle-to-vehicle pull | Stuck in mud or a ditch with another rig nearby |
| Winch | Self-recovery | Riding solo or no other vehicle available |
| Traction boards | Tire grip | Spinning on slick rock, sand, or ice |
| Collapsible shovel | Digging out | Wheels buried to the frame |
Emergency, First Aid, and Communication Gear
Trailside emergencies demand more than mechanical tools. A well-stocked first aid kit should include bandages, antiseptic wipes, gauze, and a trauma dressing for serious bleeding. Add personal medications and an emergency blanket for shock or cold exposure.
Communication is the piece most riders overlook. Cell service disappears quickly once you leave paved roads. A handheld GPS lets you mark your route and find your way back. A headlamp with spare batteries is critical after dark, and a whistle or signal mirror can help search parties locate you.
Your phone is a backup, not a primary tool. Pack a dedicated GPS unit and a paper map of the area. Batteries die and screens crack, but a printed map of the trail system never runs out of power.
Storage Solutions and Weight Distribution
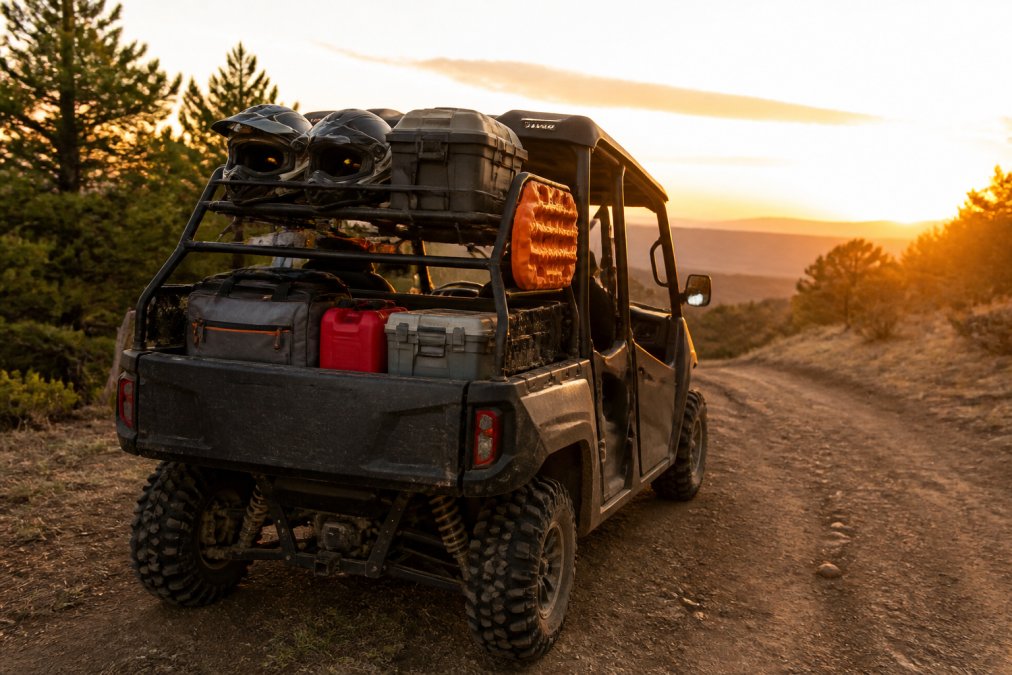
How you pack your utv trail riding gear matters as much as what you pack. Poor weight distribution changes your UTV's handling and can make it unstable on off-road terrain. Heavy items belong low and centered, near the floor and between the wheels. Light, bulky items go on top.
Guidance from the Specialty Vehicle Institute of America emphasizes that overloading a side-by-side compromises its suspension and braking. Check your owner's manual for the maximum cargo weight and stay well below it.
- Keep recovery gear and tools in a sealed, lockable box mounted to the rear rack
- Store the first aid kit in a separate, brightly colored bag for quick access
- Use a hydration pack worn on your body, not strapped to the machine, so water is available even if you leave the UTV
- Secure every item with ratchet straps, not bungee cords, which can snap and become projectiles
Your Pre-Ride UTV Trail Riding Checklist
Most guides tell you what to pack. Few tell you how to prevent needing that gear in the first place. A five-minute pre-ride inspection is the single most effective way to avoid a day-ending breakdown, a systematic walk-around that catches common failure points before they leave you stranded.
The 5-Minute Walk-Around
Start at the front and work your way around in a consistent pattern so you do not skip a component.
1. Tires and Wheels
- Check tire pressure with a digital gauge. The correct PSI is printed on the sidewall or in your owner's manual. Do not rely on visual inspection, a tire can lose 10 PSI and still look full.
- Inspect the tread for embedded rocks, nails, or cuts. A sidewall cut is a tire failure waiting to happen.
- Check the bead area for signs of air leakage, indicated by a white residue or dirt line.
- Verify that all lug nuts are torqued to spec. A loose wheel can cause a hub failure that is not repairable on the trail.
2. Fluids and Leaks
- Look under the machine for fresh oil, coolant, or gear oil drips. A small puddle on the trailer is a warning sign.
- Check the coolant level in the overflow tank when the engine is cold. Low coolant is the leading cause of overheating on the trail.
- Pull the dipstick and check the oil level and condition. Oil that is milky or smells burnt indicates a problem.
- Inspect the brake fluid reservoir. Low brake fluid often indicates worn pads or a leak.
3. Belt and Clutch (Belt-Driven Models)
- Remove the belt cover and inspect the belt for cracks, fraying, or glazing. A belt with a shiny, polished surface has lost its grip and will slip under load.
- Check the clutch sheaves for wear. A grooved or pitted sheave will eat a new belt quickly.
- Ensure your spare belt is on board and stored properly (see the repair tools section).
4. Battery and Electrical
- Check the battery terminals for corrosion. A white or green powdery buildup interrupts the flow of power.
- Ensure the battery is securely mounted. A loose battery can short out against the frame.
- Test all lights: headlights, taillights, brake lights, and turn signals. A failed brake light is a safety hazard on group rides.
5. Brakes and Steering
- Test the brakes at low speed before you leave the staging area. The pedal should feel firm, not spongy.
- Check the brake pads for wear. If you can see less than 1/8 inch of pad material, they need replacement.
- Wiggle the steering wheel or handlebars. Excessive play indicates worn tie rods or ball joints.
6. Cargo and Straps
- Verify that all cargo is secured with ratchet straps, not bungee cords. A loose item can shift and change your center of gravity.
- Check that the spare tire, if carried, is properly mounted and not rubbing against any moving parts.
- Confirm that your first aid kit and recovery gear are accessible, not buried under other cargo.
The 30-Second Cabin Check
Before you start the engine, run through this quick list:
- Seat belts function and latch properly
- Mirrors are adjusted
- Helmet and goggles are on and secure
- GPS or phone is mounted and charged
- You have told someone your planned route and expected return time
The Post-Ride Debrief
A 60-second post-ride check extends the life of your machine and makes the next pre-ride inspection faster. After you unload:
- Wash off mud and debris from the undercarriage and suspension.
- Inspect the belt and air filter for dust and dirt.
- Note any unusual noises or vibrations you heard during the ride.
- Top off fluids if needed.
This habit turns reactive maintenance into proactive maintenance. Riders who follow this pattern report fewer trailside failures and a longer lifespan for belts, tires, and clutches.
Conclusion: Ride Prepared on Every Trail
Building your utv trail riding gear kit is not about buying every accessory on the shelf. It is about covering the three failure points that end rides: personal injury, mechanical breakdown, and getting stuck. Start with the best UTV safety equipment you can afford, pack the tools to fix your specific machine, and never leave the trailer without recovery gear and a way to call for help.
At Monarch Honda, we have spent 50 years helping riders in the Orem area get the right machine and gear for their adventures. Our in-house service department provides expert maintenance and service support, and our team delivers a customer-focused experience where passion meets performance.
Frequently Asked Questions
What are the must-haves for UTV trail riding?
The must-haves for UTV trail riding fall into four categories: personal safety, mechanical preparedness, recovery, and communication. For safety, wear a DOT-approved helmet, goggles, and gloves. Carry a basic tool kit with zip ties and duct tape for trailside fixes. A UTV recovery gear kit with a tow strap and shackles is essential for getting unstuck. Finally, bring a charged phone or GPS device and a first aid kit. This UTV trail riding gear essentials list covers the basics for a safe and enjoyable day.
What is the best UTV safety equipment for new riders?
The best UTV safety equipment for new riders starts with a properly fitted, safety-certified helmet and impact-resistant goggles. Vented gloves improve grip and protect your hands. For dusty conditions, a dust mask or neck gaiter helps you breathe easier. While a roll cage and seat belts are built-in, adding a fire extinguisher mounted within reach is a smart upgrade. New riders should prioritize these items before adding comfort accessories. The factory seat belts should always be fastened before the vehicle moves.
What should I pack in a UTV recovery gear kit?
A UTV recovery gear kit should include a kinetic recovery rope or tow strap rated for your vehicle's weight, two rated soft shackles, and a sturdy recovery damper to absorb energy if the line snaps. A compact 12v air compressor is critical for reinflating tires after airing down on sand or rocky terrain. Include a tire plug kit for punctures. You can build your own kit or buy a pre-assembled bundle, but verify the weight rating matches your specific UTV model.
How do I prepare my UTV for a long trail ride?
Preparing your UTV for a long trail ride starts with a thorough pre-ride inspection. Check tire pressure and tread, and look for leaks. Verify fluid levels including oil and coolant. Confirm all lights and signals work. Test the brakes and steering. Secure all cargo with straps, and check that your spare belt and tools are onboard. Finally, share your route and expected return time with someone back home. This routine prevents most mechanical issues on the trail.
The trail rewards those who prepare for it. Monarch Honda is an authorized Honda Powersports dealership with new and pre-owned inventory, a full service department, and rental options to test your next machine. Search our inventory and build the UTV setup that will carry you through every trail with confidence.